 (Fig. 3)
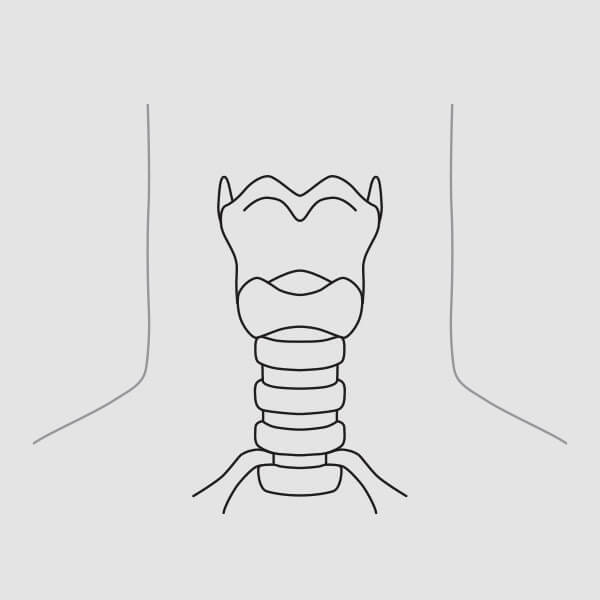
NOTE: Dual cannula tracheostomy tubes may also be placed using the following technique. The inner cannula must be removed for introduction. Always check the fit of the dilator to the tracheostomy tube prior to insertion.1. Palpate landmark structures (thyroid notch, cricoid cartilage) to ascertain the proper location for tracheostomy tube placement. Access and, ultimately, tube placement is ideally made at the level between the first and second tracheal cartilages or between the second and third tracheal cartilages whenever feasible. (Fig. 3)
 (Fig. 5)
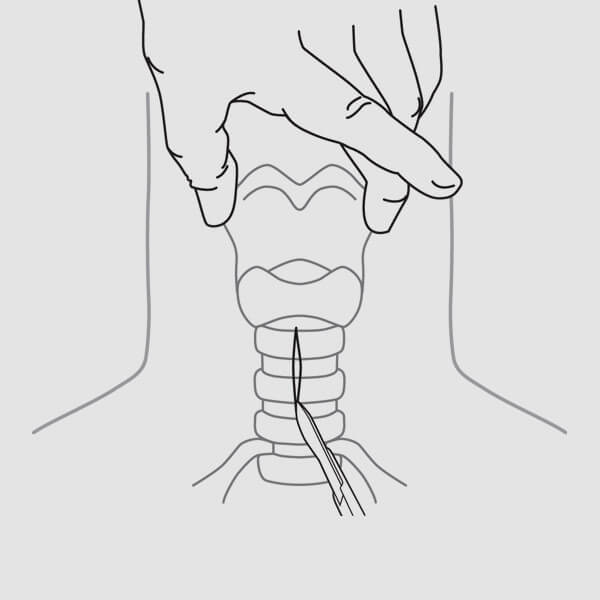
2. After introducing local anesthesia, make a 1.5-2.0 cm skin incision (vertical or horizontal) at the chosen insertion site. (Fig. 5)
 (Fig. 6)
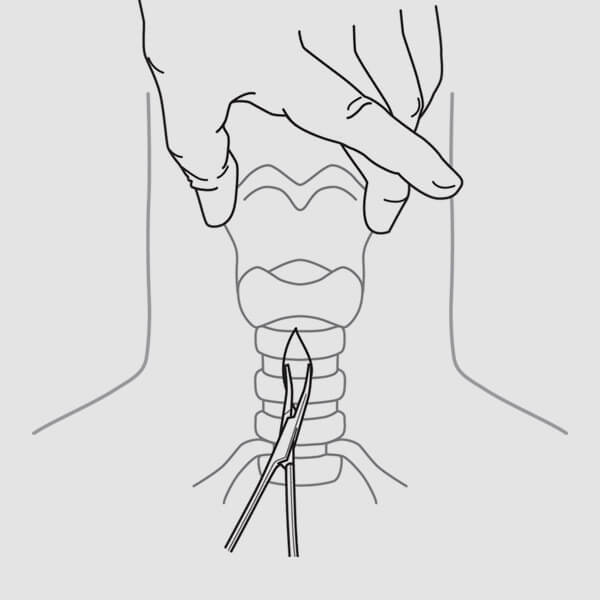
3. If desired, use a curved mosquito clamp to gently dissect vertically and transversely down to the anterior tracheal wall. (Fig. 6) With a finger tip, dissect the front of the trachea, in the midline, free of any tissues and identify the cricoid cartilage. Displace the isthmus of the thyroid downward, if present. NOTE: An adequate skin incision and blunt dissection of the subcutaneous tissue can minimize the need for excessive force and torque throughout the procedure. Excessive force and rotation may lead to long-term complications (e.g., stenosis).4. Deflate the endotracheal tube cuff and withdraw to an appropriate distance above the insertion site, yet still within the trachea. Re-inflate the cuff once the proper position of the endotracheal tube has been reached.
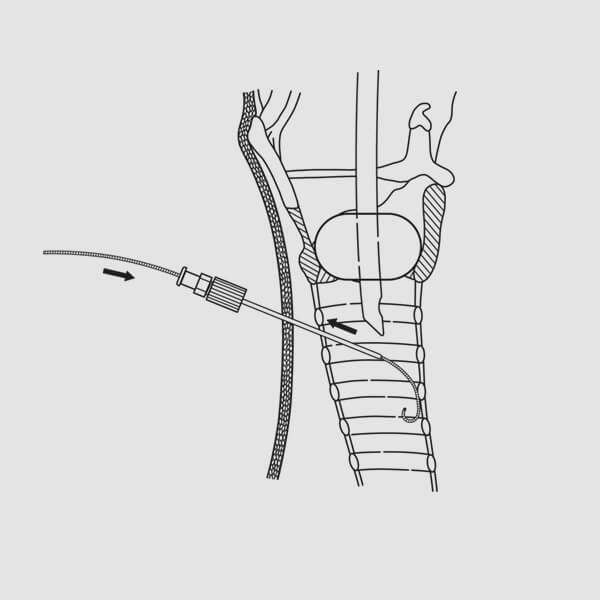
 (Fig. 7)
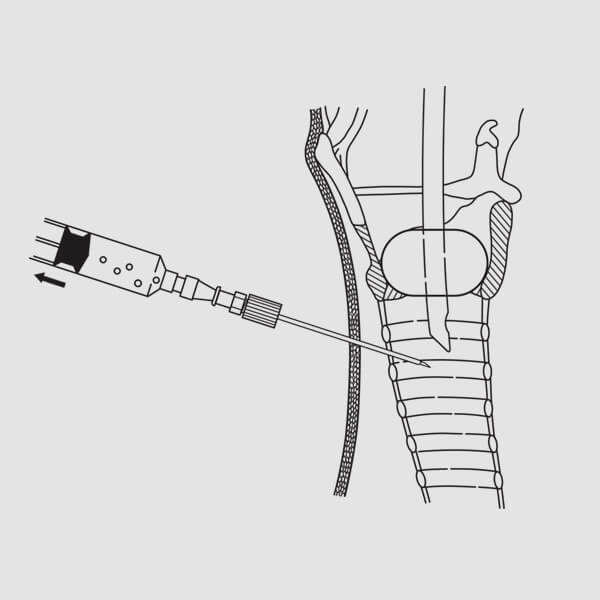
5. Attach a syringe half-filled with fluid to the introducer needle and seek the tracheal air column by directing the needle, in the midline, posterior. Verify the needle’s entrance into the tracheal lumen via aspiration on the syringe resulting in air bubble return. (Fig. 7) Alternatively, if using bronchoscopy, visualize the needle entering the trachea. NOTE: It is important that the needle not impale the endotracheal tube. To ensure that the endotracheal tube is not impaled, gently move it in and out 1 cm. If the tube is impaled, the needle will be seen and felt to also move. If this occurs, it will be necessary to withdraw the needle, pull back the endotracheal tube, and then reinsert the needle. NOTE: Proper positioning and alignment may help minimize complications (e.g., stenosis).6. With the needle tip positioned in the trachea, local anesthesia may be injected (if necessary).
7. When free flow of air is obtained, with no impalement of the endotracheal tube, remove the inner needle of the introducer needle assembly and advance the outer FEP sheath several millimeters. NOTE: If using an introducer needle without a sheath, proceed to step 9.
 (Fig. 8)
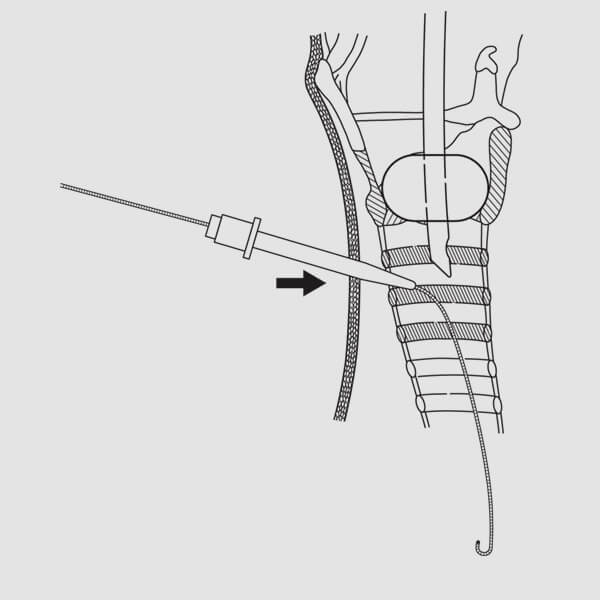
8. Attach a syringe to the FEP sheath and re-confirm position within the tracheal lumen by visualizing free flow of air into the syringe when aspirated. (Fig. 8) Alternatively, re-confirm position by visualizing the FEP sheath in the trachea with the bronchoscope. Remove the syringe.
 (Fig. 9)
9. Introduce the J-tipped wire guide several centimeters into the trachea. (Fig. 9) NOTE: The wire should advance freely, without resistance. If resistance is encountered, do not force the wire guide. Confirm correct FEP sheath or introducer needle placement via bronchoscopy, then advance the wire guide into the trachea until the distal mark on the wire guide reaches skin level.10. Remove the FEP sheath or introducer needle while maintaining wire guide position within the tracheal lumen. (Fig. 9)
 (Fig. 10)
11. Maintaining the wire guide‘s position at the skin level mark, dilate the initial tracheal access site by advancing the short, 14 French introducer dilator over the wire guide with a slight twisting motion. (Fig. 10)12. Remove the dilator while maintaining wire guide position.
13. Activate the hydrophilic coating by immersing the distal end of the Blue Rhino G2-Multi dilator in sterile water or saline.
 (Fig. 11)
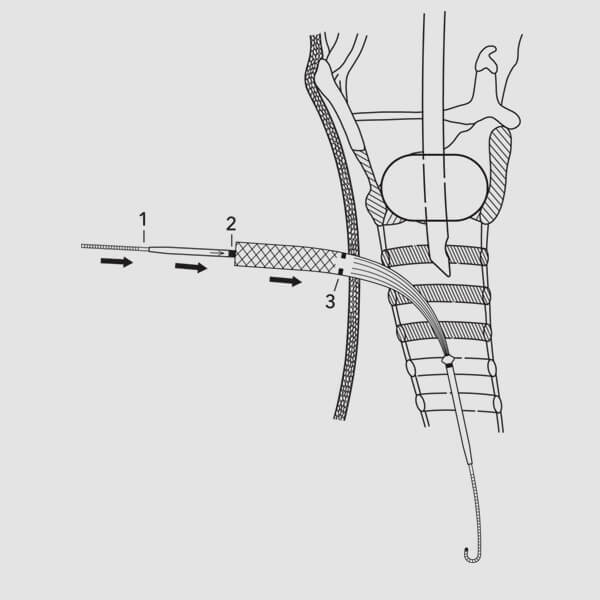
14. Advance the Blue Rhino G2-Multi dilator and the guiding catheter as a unit over the wire guide, while maintaining wire guide position. (Fig. 11) NOTE: Align the proximal end of the guiding catheter at the mark on the proximal portion of the wire guide. (Fig. 1) This will ensure that the distal end of the guiding catheter is properly positioned back on the wire guide, preventing possible trauma to the posterior tracheal wall during subsequent manipulations. NOTE: Bronchoscopic guidance may also prevent possible trauma to the posterior tracheal wall.15. Begin to dilate the tracheal access site by advancing the guiding catheter and Blue Rhino G2-Multi dilator into the trachea. To properly align the dilator on the wire guide/guiding catheter assembly, position the proximal end of the dilator at the single positioning mark on the guiding catheter. This will ensure that the distal tip of the dilator is properly positioned at the safety ridge on the guiding catheter to prevent possible trauma to the posterior tracheal wall during introduction. While maintaining the visual reference points and positioning relationships of the wire guide, guiding catheter and dilator, advance them as a unit to the skin level mark on the Blue Rhino G2-Multi dilator. (Fig. 11) NOTE: Proper positioning and alignment may help minimize complications (e.g., stenosis).
 (Fig. 12)
16. Advance and pull back the dilating assembly several times to effectively dilate the tracheal access site. NOTE: The wire guide must always lead the dilator and the guiding catheter assembly to prevent possible trauma to the posterior tracheal wall during dilation. Care should be taken to keep the guiding catheter assembly properly aligned with the mark on the proximal portion of the wire guide. This will ensure that the tip of the guiding catheter assembly does not advance beyond the distal tip of the wire guide within the trachea.17. Remove the Blue Rhino G2-Multi dilator, leaving the wire guide/guiding catheter assembly in position. Respiratory air leak through the tracheostomy stoma should be noted to confirm intratracheal location of the wire guide and guiding catheter.
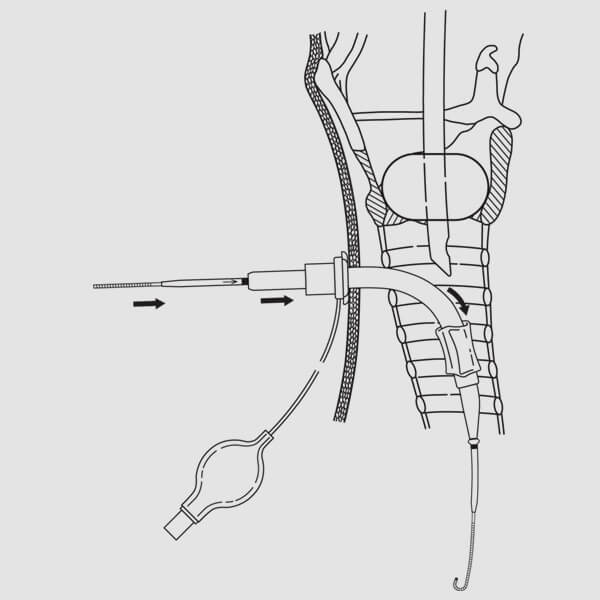
18. Advance the tracheostomy tube (loaded on the dilator) over the wire guide/guiding catheter assembly to the safety ridge of the guiding catheter, then advance wire guide, guiding catheter, loading dilator, and tracheostomy tube as a unit into trachea. (Fig. 12) NOTE: The assembly should be directed perpendicular to the axis of the trachea during insertion for uniform dilation between tracheal cartilages. Once the tracheostomy tube is within the tracheal lumen, the assembly may be directed caudad. NOTE: Proper positioning and alignment may help minimize complications (e.g., stenosis).
 (Fig. 13)
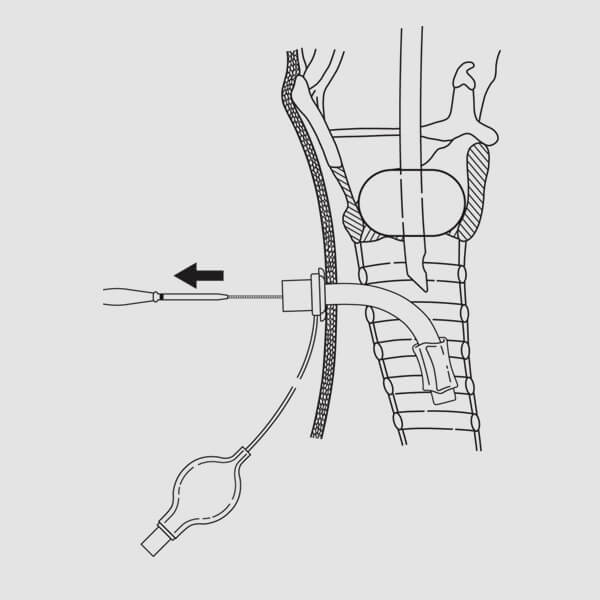
19. Advance the tracheostomy tube to its flange.
Remove the dilator, guiding catheter, and wire guide, leaving the tracheostomy tube in place. (Fig.13) NOTE: At this point, the bronchoscope may be inserted into the tracheostomy tube to confirm correct placement. NOTE: If using a dual cannula tracheostomy tube, insert the inner cannula at this point.20. Inflate the tracheostomy tube balloon cuff. Connect the tracheostomy tube to the ventilator. Confirm position of the tracheostomy tube via standard methods (e.g., capnography, breath sounds, etc.).
21. Deflate and remove the endotracheal tube.
22. Perform suction to determine if any significant bleeding or possible obstruction exists that has not been noted to this point.
23. If necessary, one suture may be taken at the bottom of the initial incision.
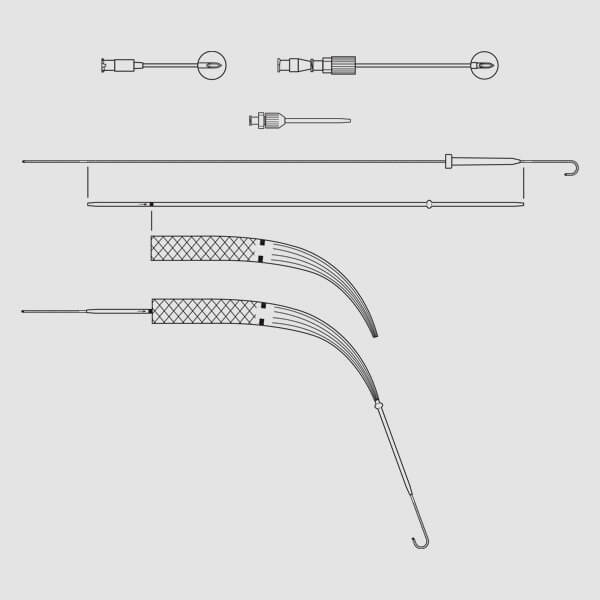 (Fig. 1)
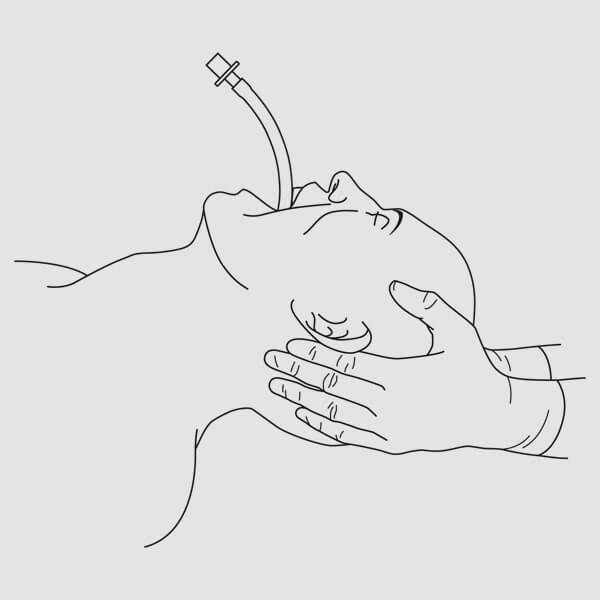 (Fig. 4)
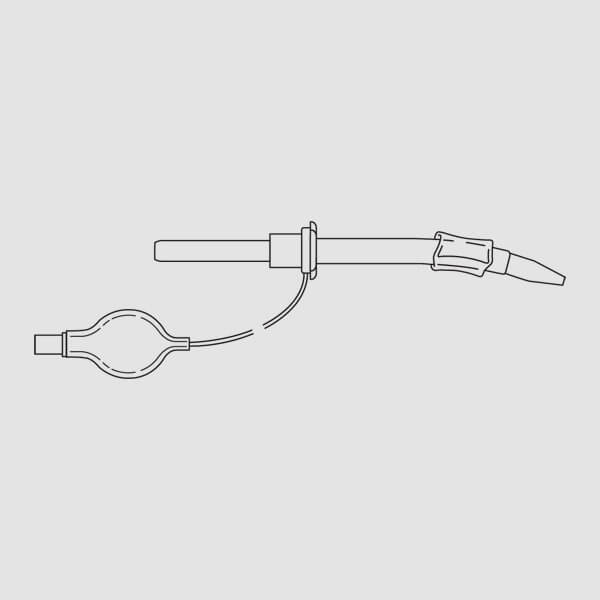 (Fig. 2)